Saturday, 24 August 2013

Li'l Flowers on the Itty - Bitty Dress

I am at that age where a majority of my friends have kids. For some reason, I seem to be the 'Kooky Aunt' to more little girls than boys. Not that I'm complaining.... I find SO many more patterns to make pretty things for girls, than I do for boys.
Some time back, I decided to start making stuff for the lil ladies ... and basically because my skills are still restricted to making simple dresses; I started with the Absolutely Awesome Itty Bitty Dress by Rae. Rae's blog not only showcases the patterns she sells, but also has a bunch of free patterns that are quite easy to make and a few tutorials for the really green (like me).

At the time I started the list of dresses, Priya (close friend) was moving cities, and I was hoping to complete a dress for her daughter Inika before she left. I made the dress a tad larger, So no photos of it on the adorable model yet. :)


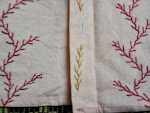
The itty bitty dress pattern can be found here. This pattern is meant for a newborn. A larger size for the same dress can be found here; which I used. I used a soft white cotton to line the inside of the bodice, and used a satin bias tape for the waist. It's a lovely rich colour, just a shade deeper than the teeny flowers on the material. The fabric itself is a pure cotton, soft to feel, and happy to play in.

I was originally planning to follow the patterns completely; but once I'd completed the dress, I thought that it didn't need bias tape on the hem. Especially so, since my bias tape was satin, and one loose stitch could have it drooping off and looking ugly. Also, I was kinda in love with the print on the fabric. :P

I have been promised photos of the dress being modelled by the  Lovely Miss Inika soon; and will upload them as soon as I get them. In the meanwhile, here is the dress again.


Sunday, 18 August 2013

Latest Sewing Acquisition: Pinking Shears!

I had a B'day recently. My 31st year on the planet reached it's conclusion with both me and the planet still able to bear the other. And thus, it was a day of celebration. I received a bunch of stuff.... a phone from the husband (though that one came a couple of weeks in advance), material that will soon become a kurta (design identified... courage to be gathered!), heart-shaped and more regularly usable cupcake moulds and the such. But one friend - the very intelligent Reema from http://cameralore.wordpress.com decided to ask me straight out what I wanted. After some dilly-dallying, I realised that I did want something - A pair of Pinking Shears for cloth!

Now, the couple of times that I had tried to look for them, I had found sad, not really durable ones. So I told her to get me a pair if she found a good one. And she did! This pair is really good, and I am hoping to get plenty of use out of it. The insides of my home made clothes will look so much better now! (This photo has been taken with the brand new phone :P)


Prompt use has been made, and with great joy and happiness. More on that later.

Monday, 12 August 2013

Embroidery on Kiddie Clothes - 1

Before I got my sewing - machine, I was dabbling in painting and embroidering on clothes. Although I've done bits and pieces for myself, the most satisfying experience is when I embroider kiddie clothes. I think it has something to do with the fact that each garment is so itty-bitty, and gets done quickly! :)

One of the most awesome stitches to do on tiny items is the Open Feather Stitch. It's simple, rapidly completed, and yet manages to look detailed and stylish. (OK, so stylish doesn't apply that well with a kiddie top. But it does look stylish. More on that later). The important thing is to choose a good design, and the right colours. A lovely tutorial to using the feather stitch is here. I have been using this stitch for over a decade and a half now; but for a beginner, Sarah provides lucid and clear instructions. Initially, it can be a tad difficult to get the side branches to look even; so I would recommend penciling in lines to ensure that it looks good.
For the kiddie items, I like to go with a basic tree / bush / coral reef pattern. The design is uni-sex, and that is a tremendous help here in India, where it's illegal to identify the sex of an unborn child. And since I certainly lack this little thing called drive-to-work-rapidly, I need to bet started on stuff before babies arrive! :P

Now to the specifics! For the first piece that had sleeves, the branches for each tree were more delicate, and a li'l branch went onto each of the sleeves. The shirt was a pale green, and so I chose my favorite red and purple embroidery threads.
PhotoPhoto
The other shirt was a much brighter orange, and so I decided to use red and mustard threads to make it look fun. This was also a larger size, and so the trees got a bit bigger, with branches spaced out a tad bit more. It's awesome how a teeny bit more space between stitches can change the way the design feels. This shirt had a little space between buttons, and so I decided to add a couple of mustard branches between buttonholes - two reasons.... it looked a tad special; and I finished the length of mustard thread I had cut!

PhotoPhoto
Two hours of T.V and embroidery, and these were ready to roll. More stitches to be discussed soon!

Saturday, 27 July 2013

Painting a Rug

Immediately post my wedding I has shuttling between cities, getting adjusted to running the house, and doing a whole lot of things that were either new (and needed getting used to) or boring (and needed getting adjusted to). This ensured that my crafting had come to a complete stop. Life was awesome, but was missing a certain cheap-thrills / glee element. So when I took a break to get my messed up health back on track, I decided to ensure that my previously sporadic crafting would now become a regular part of life.

One of the first plans I made was to beautify the everyday use objects that were in desperate need of pretti-fication. When I mentioned this to Shri, his response was "They do??" (Amazingly awesome husband though Shri is; he can live with butt-ugly stuff and never notice). So I started. The first item on my list was a boring, striped cotton area rug. Although eminently useful and colorful, it lacked what I like to call either 'character' or 'pizzazz'.

The colors on the rug kinda made me think of the Savannah (or the fact that I was watching a series on animal life in Africa did). So I decided to paint some animals silhouettes on it, the way they are seen against the evening  / morning light in the documentaries. Of,course, the fact that this meant using a single color was an important deciding factor. :P

This is kinda what inspired me


Once I had decided to do animal silhouettes, I had to choose animals. And I quickly realized that the very bright colors on the rug would dampen the impact that most animal silhouettes would have. So I needed a very distinctive shape, and found that the giraffe best suited my needs. I cut out a giraffe shape in card-paper, and then used it to trace outlines onto the rug in chalk. This helped me decide on the placement, and also ensured that I would not have to deal with a stencil while painting. I was worried that paint may bleed off the edges of a paper / card stencil onto the surrounding areas; particularly since the rug was a very absorbent cotton.

Used a nice brown shade in fabric colors, and applied about three coats for each silhouette. This was the first one.

Photo

Once I was sure I liked what I was making, I added another four behind the first one to complete the side.
Photo

Originally, I had thought of painting on only one side of the rug. But with one side complete, I realized that I would have to paint the other side as well! So more paint was bought, and more giraffe's appeared on the other end of the rug. End result - awesome looking rug that is still looking good and making our living room look cool 2 years later. :)
Photo

Sunday, 21 July 2013

Butterfly's on a Clock


Recently (OK, not so recently) I had ordered a mirror finish clock off a shopping website. It's a simple round clock face, with a few butterfly's flying out of it. It fit in perfectly with the minimalist/classic/natural theme of my attempts at decor. The only problem was, when it got delivered, it had a crack. Right in the middle, and eminently noticeable, thanks to the clear glassy surface.
Photo

The website I had ordered from was nice enough to try and replace it, failing which they provided me with a generous voucher which I have since used to buy some awesome dinnerware. But the clock still sat in a corner, since we had no idea what to do with it (and I HATE throwing stuff out). Then the other day I suddenly remembered that Aparna had sent me some adorable butterfly cutouts. So They were dug out to see if any would cover the crack properly. And what do you know?? One did!

Photo


The clock had come with a number of double sided sticky dots. Using one, I managed to secure the butterfly flat to the clock-face. Thus "repaired", the clock promptly went up on the wall. I decided to add a couple more of Aparna's butterfly's along with the mirror finish ones just so there's some color; and voila! Awesome time-telling wall decor was in action.


Monday, 1 July 2013

Flared Cotton Top


My fascination with clothes continues. As does my desire to try stunts. The biggest issue I had with the previously made Kaftan Top was that it bellowed around the belly. Now I wanted to make something that was simple, but comfortable and flattering. So a basic flared top like the one shown here was the chosen victim.

The original tutorial was written with jersey fabric in mind, but I (the one with abundant foolhardiness) decided to experiment with a soft cotton instead. 'Why, Why when you are just learning?' you may ask. Well, for one, I love using cotton and for another, finding jersey or other soft knits in my area in a pain in the brain! The question of the day now was: Would the flared hem fall as gracefully in cotton, or would it stick out comically?

I am glad to say that it sits reasonably well. It's a li'l flared and fun, and thankfully, not comical.

PhotoI chose to use some prudence, and cut the sleeves without any flare. With my not-at-all-slim frame, I really can't carry off floppy sleeves; particularly in cotton. This gave the whole thing a rather simplistic look, but I like that.


Photo

The one mistake-ish I made, is that I tried to fold over the edges and stitch for the armholes, neck and hem. While this works perfectly for the armholes and the hem, it's not the best idea for a curved neckline! Cotton does not feel happy about being folded and stitched over... so I got a really narrow hem (and may just have skewed the neckline a bit at that).


 At this point I tried the top on, and it kinda floated around me a little funnily.


To ensure that it fit, I put in darts at the back. This image and tutorial supplied by Melanie Rose gives an idea of the various ways to use darts in different locations. I put in two darts in the back (the orange markings for the back in the diagram), and suddenly the thing looked just purty!


And so, the top was ready for use. I did a library run in it, and it felt really comfy and felt good. Happy days!


Photo

Wednesday, 26 June 2013

Simple Kaftan Top


When I study, I crave shopping for clothes.
How reading about the theories and applications of Psychology connects to the desire to go forth and buy items of clothing is, and probably shall always remain a mystery to my simple mind. But there does exist a connection. So when I started preparing for my PhD., there came that inane desire to go into a shop filled with clothes and get confused. May I point out here, I presently have neither the patience nor the energy required to try out a gazillion clothes to find something that fit me and looked kinda-sorta pretty at the same time!

A disaster in the making you say? The husband to deal with an academically saturated and shopping frustrated monster? May have been.... Except, this time I was prepared with a healthier solution! For some time now, I have been collecting sewing patterns and techniques to try out. So I decided to pull out cloth stowed away, and make a few muslins and see if making clothes was a real option (for the uninitiated, a muslin is a trial item made with simpler / less expensive material before making something with a really expensive material). A little sewing every couple of days has kept me mostly out of the shops for a good 2.5 months now. :)

Kaftan top's seem very 'in' apparently, so i decided to try making one. I followed this really simple pattern, but cut the material to a little below Hip - length. Once I'd made the basic top, I decided to try my hand at shirring as well.
Photo


Photo


That is where I learnt a VERY important lesson: Shirring gathers the cloth in a LOT. So I snipped the elastic thread in a little over half the back. But thanks to the gathers in the front, the back actually fits pretty decently too.


The arm - holes were just right, and the fit is very comfortable. I also like to pretend that my waist feels flattered (no no, don't disillusion me). But the most fun is the wide boat neck. The next photo show's off the neck 
Photo


(The mania - like expression is not real. Shri demanded I 'keep my eyes open'. This is what happened!)


The next time, I'm going to add some width to the front piece, and let the extra material form a slight cowl at the neck. It'll feel more comfy; and may even look more classy!
This one's pretty decent for a simple day out though. I wore it out just yesterday, and it was comfortable, and with the right jewelry, looked quite stylish, I thought. :)